JupyterLab - Going Deeper
Markdown Formatting
The five most important concepts to format your code appropriately when using markdown are:
- Italics: Surround your text with ‘_’ or ‘*’
- Bold: Surround your text with ‘__’ or ‘**’
inline: Surround your text with ‘`’-
blockquote: Place ‘>’ before your text.
- Links: Surround the text you want to link with ‘[]’ and place the link adjacent to the text, surrounded with ‘()’
Headings
Notice that including a hashtag before the text in a markdown cell makes the text a heading. The number of hashtags you include will determine the priority of the header (‘#’ is level one, ‘##’ is level two, ‘###’ is level three and ‘####’ is level four).
# H1
## H2
### H3
#### H4
##### H5
###### H6

Alternatively, for H1 and H2, an underline-ish style:

Alt-H1
======

Alt-H2
------
H1
H2
H3
H4
H5
H6
Alternatively, for H1 and H2, an underline-ish style:
Alt-H1
Alt-H2
Emphasis
Emphasis, aka italics, with *asterisks* or _underscores_.

Strong emphasis, aka bold, with **asterisks** or __underscores__.

Combined emphasis with **asterisks and _underscores_**.

Strikethrough uses two tildes. ~~Scratch this.~~
Emphasis, aka italics, with asterisks or underscores.
Strong emphasis, aka bold, with asterisks or underscores.
Combined emphasis with asterisks and underscores.
Strikethrough uses two tildes. Scratch this.
Lists
There are three types of lists in markdown.
Ordered list:
- Step 1
- Step 1B
- Step 3
Unordered list
- CESM-POP
- CESM-MOM
- CESM-CAM
Task list
- Learn Jupyter Notebooks
- Writing
- Modes
- Other Considerations
- Submit Paper
NOTE:
Double click on each to see how they are built!
Images
Here's our logo (hover to see the title text):
Inline-style:

Reference-style:
![alt text][logo]
[logo]: https://github.com/adam-p/markdown-here/raw/master/src/common/images/icon48.png "Logo Title Text 2"
Here’s our logo (hover to see the title text):
Inline-style:

Reference-style:

Code and Syntax Highlighting
Code blocks are part of the Markdown spec, but syntax highlighting isn’t. However, many renderers – like Github’s and Markdown Here – support syntax highlighting. Markdown Here supports highlighting for dozens of languages (and not-really-languages, like diffs and HTTP headers); to see the complete list, and how to write the language names, see the highlight.js demo page.
Inline `code` has `back-ticks around` it.
Inline code has back-ticks around it.
Blocks of code are either fenced by lines with three back-ticks ```, or are indented with four spaces. I recommend only using the fenced code blocks – they’re easier and only they support syntax highlighting.
```javascript
var s = "JavaScript syntax highlighting";
alert(s);
```

```python
s = "Python syntax highlighting"
print s
```

```
No language indicated, so no syntax highlighting.
But let's throw in a <b>tag</b>.
```
var s = "JavaScript syntax highlighting";
alert(s);
s = "Python syntax highlighting"
print(s)
No language indicated, so no syntax highlighting in Markdown Here (varies on Github).
But let's throw in a <b>tag</b>.
Again, to see what languages are available for highlighting, and how to write those language names, see the highlight.js demo page.
Tables
Tables aren’t part of the core Markdown spec, but they are part of GFM and Markdown Here supports them.
Colons can be used to align columns.

| Tables        | Are           | Cool  |
| ------------- |:-------------:| -----:|
| col 3 is      | right-aligned | $1600 |
| col 2 is      | centered      |   $12 |
| zebra stripes | are neat      |    $1 |

The outer pipes (|) are optional, and you don't need to make the raw Markdown line up prettily. You can also use inline Markdown.

Markdown | Less | Pretty
--- | --- | ---
*Still* | `renders` | **nicely**
1 | 2 | 3
Colons can be used to align columns.
| Tables | Are | Cool |
|---|---|---|
| col 3 is | right-aligned | $1600 |
| col 2 is | centered | $12 |
| zebra stripes | are neat | $1 |
Blockquotes
> Blockquotes are very handy in email to emulate reply text.
> This line is part of the same quote.

Quote break.

> This is a very long line that will still be quoted properly when it wraps. Oh boy let's keep writing to make sure this is long enough to actually wrap for everyone. Oh, you can *put* **Markdown** into a blockquote.
Blockquotes are very handy in email to emulate reply text. This line is part of the same quote.
Quote break.
This is a very long line that will still be quoted properly when it wraps. Oh boy let’s keep writing to make sure this is long enough to actually wrap for everyone. Oh, you can put Markdown into a blockquote.
Inline HTML
You can also use raw HTML in your Markdown, and it’ll mostly work pretty well.
<dl>
  <dt>Definition list</dt>
  <dd>Is something people use sometimes.</dd>

  <dt>Markdown in HTML</dt>
  <dd>Does *not* work **very** well. Use HTML <em>tags</em>.</dd>
</dl>
- Definition list
- Is something people use sometimes.
- Markdown in HTML
- Does *not* work **very** well. Use HTML tags.
Horizontal Rule
Three or more...

---

Hyphens

***

Asterisks

___

Underscores
Three or more…
Hyphens
Asterisks
Underscores
Line Breaks
My basic recommendation for learning how line breaks work is to experiment and discover – hit <Enter> once (i.e., insert one newline), then hit it twice (i.e., insert two newlines), see what happens. You’ll soon learn to get what you want. “Markdown Toggle” is your friend.
Here are some things to try out:
Here's a line for us to start with.

This line is separated from the one above by two newlines, so it will be a *separate paragraph*.

This line is also a separate paragraph, but...
This line is only separated by a single newline, so it's a separate line in the *same paragraph*.
Here’s a line for us to start with.
This line is separated from the one above by two newlines, so it will be a separate paragraph.
This line is also begins a separate paragraph, but… This line is only separated by a single newline, so it’s a separate line in the same paragraph.
(Technical note: Markdown Here uses GFM line breaks, so there’s no need to use MD’s two-space line breaks.)
YouTube Videos
They can’t be added directly but you can add an image with a link to the video like this:
<a href="http://www.youtube.com/watch?feature=player_embedded&v=YOUTUBE_VIDEO_ID_HERE
" target="_blank"><img src="http://img.youtube.com/vi/YOUTUBE_VIDEO_ID_HERE/0.jpg"
alt="IMAGE ALT TEXT HERE" width="240" height="180" border="10" /></a>
Or, in pure Markdown, but losing the image sizing and border:
[](http://www.youtube.com/watch?v=YOUTUBE_VIDEO_ID_HERE)
TeX Mathematical Formulae
A full description of TeX math symbols is beyond the scope of this cheatsheet. Here’s a good reference, and you can try stuff out on CodeCogs. You can also play with formulae in the Markdown Here options page.
Here are some examples to try out:
$-b \pm \sqrt{b^2 - 4ac} \over 2a$
$x = a_0 + \frac{1}{a_1 + \frac{1}{a_2 + \frac{1}{a_3 + a_4}}}$
$\forall x \in X, \quad \exists y \leq \epsilon$
The beginning and ending dollar signs ($) are the delimiters for the TeX markup.
Rendered Tex:
$-b \pm \sqrt{b^2 - 4ac} \over 2a$ $x = a_0 + \frac{1}{a_1 + \frac{1}{a_2 + \frac{1}{a_3 + a_4}}}$ $\forall x \in X, \quad \exists y \leq \epsilon$
Code Capabilities
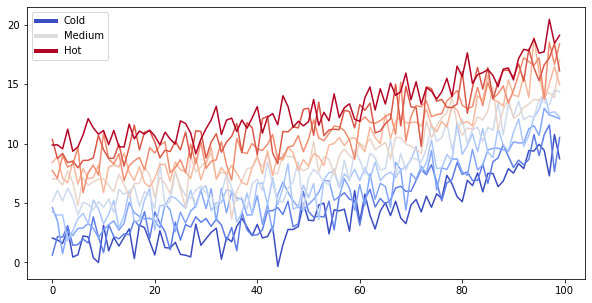
Code cells are different than Markdown cells in that they have an output cell. This means that we can keep the results of our code within the notebook and share them. Let’s say we want to show a graph that explains the result of an experiment. We can just run the necessary cells and save the notebook. The output will be there when we open it again! Try it out by running the next four cells.
from matplotlib import rcParams, cycler
import matplotlib.pyplot as plt
import numpy as np
plt.ion()
# Fixing random state for reproducibility
np.random.seed(19680801)

N = 10
data = [np.logspace(0, 1, 100) + np.random.randn(100) + ii for ii in range(N)]
data = np.array(data).T
cmap = plt.cm.coolwarm
rcParams['axes.prop_cycle'] = cycler(color=cmap(np.linspace(0, 1, N)))


from matplotlib.lines import Line2D
custom_lines = [Line2D([0], [0], color=cmap(0.), lw=4),
                Line2D([0], [0], color=cmap(.5), lw=4),
                Line2D([0], [0], color=cmap(1.), lw=4)]

fig, ax = plt.subplots(figsize=(10, 5))
lines = ax.plot(data)
ax.legend(custom_lines, ['Cold', 'Medium', 'Hot']);
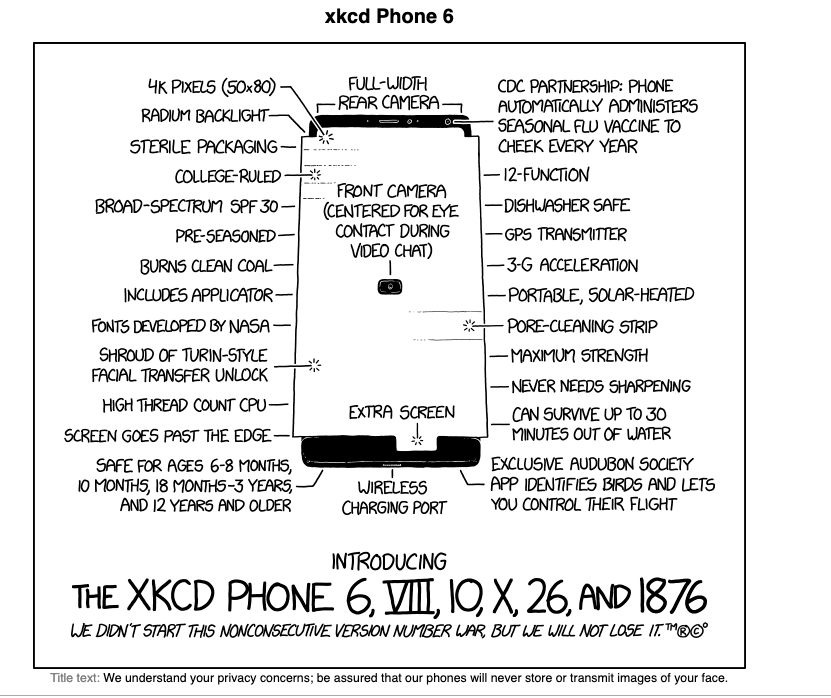
We can also print images while experimenting.
from IPython.display import Image
Image("./images/jlab/iphone.png")
- Even videos:
from IPython.display import YouTubeVideo
YouTubeVideo("aLdNDFuLazw")
Shortcuts and tricks
Command Mode Shortcuts
There are a couple of useful keyboard shortcuts in Command Mode that you can leverage to make Jupyter Notebook faster to use. Remember that to switch back and forth between Command Mode and Edit Mode with Esc and Enter.
m: Convert cell to Markdown
y: Convert cell to Code
D+D: Delete cell
o: Toggle between hide or show output
Shift+Arrow up/Arrow down: Selects multiple cells. Once you have selected them you can operate on them like a batch (run, copy, paste etc).
Shift+M: Merge selected cells.
Shift+Tab: [press once] Tells you which parameters to pass on a function
Shift+Tab: [press three times] Gives additional information on the method
Cell Tricks
import os.path
from collections import OrderedDict
- There are also some tricks that you can code into a cell.
?function-name: Shows the definition and docstring for that function
?os.path.abspath
??function-name: Shows the source code for that function
??os.path.abspath
Line Magics
Line magics are functions that you can run on cells and take as an argument the rest of the line from where they are called. You call them by placing a ‘%’ sign before the command. The most useful ones are:
%matplotlib inline: This command ensures that all matplotlib plots will be plotted in the output cell within the notebook and will be kept in the notebook when saved.
%reload_ext autoreload, %autoreload 2: Reload all modules before executing a new line. If a module is edited, it is not necessary to rerun the import commands, the modules will be reloaded automatically.
These three commands can be called together at the beginning of every notebook.
%matplotlib inline
%reload_ext autoreload
%autoreload 2
%timeit: Runs a line multiple times and displays the average time it took to run it.
%timeit [i+1 for i in range(1000)]
%debug: Allows to inspect a function which is showing an error using the Python debugger.
for i in range(1000):
    a = i+1
    b = 'string'
    c = b+1
%debug

