![]()
Repositories
As we mentioned in the section on Git, GitHub hosts bare repositories. These are repositories that cannot have code “checked out” in them. Rather, they represent just the .git hidden directory contents of a Git repository.
Let’s create a repository using the GitHub interface.
Step 1
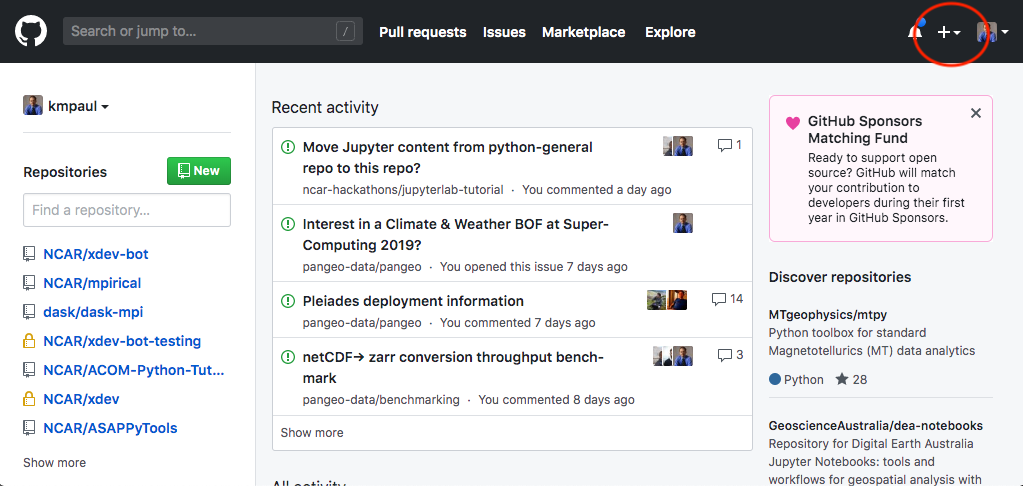
If you are logged into GitHub, you should see a “+” sign at the top-right of the page, next to your image or avatar.
Step 2
Click the “+” symbol and select “New repository”. This should take you to a repository initialization page.
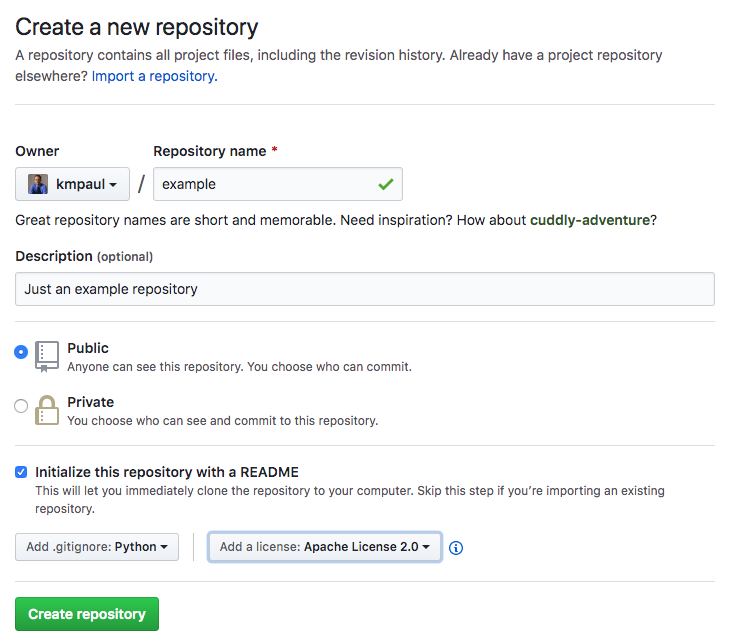
Fill out the form as you see here and click “Create repository”.
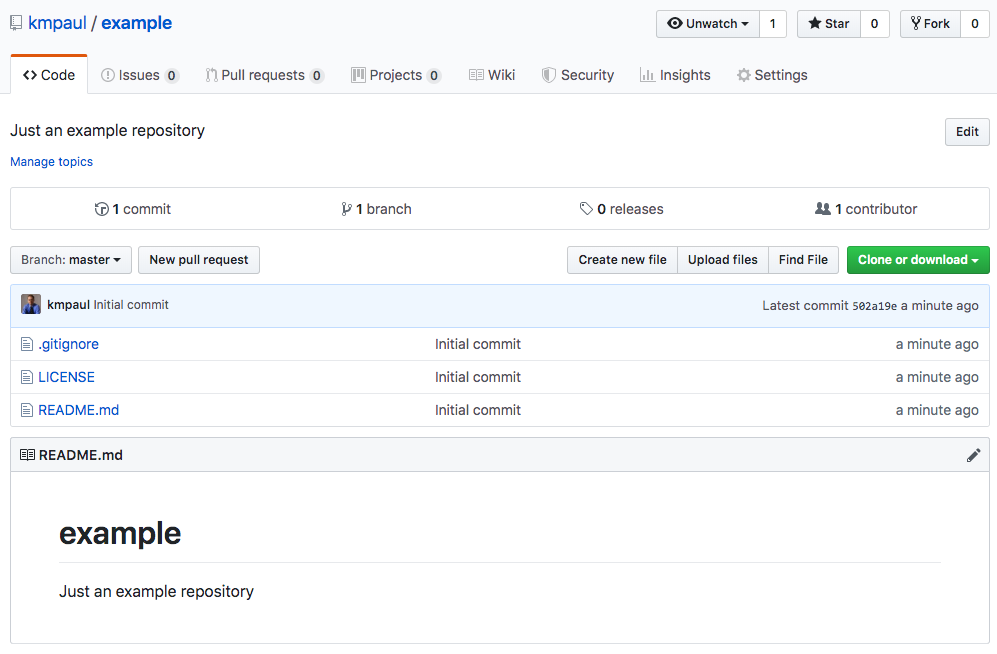
Finally, this should take you to the home page for your GitHub Repository.
What you should see
Moving from top to bottom on this page, you should see the following.
-
Notice that the top left of the page tells you the owner of the repository (you!) and the name of the repository. If you click on either, it will take you to the home page for them (your account or your repository).
-
The top-right of the page has a count of the number of GitHub users who are “watching” this repo, who have “starred” the repo, and who have “forked” the repo. Watchers will get notifications whenever something happens on the repository (e.g., issue, pull request, commits, etc.). Starring a repo essentially “bookmarks” the repo so you can easily find it on your GitHub home page, but stars are also a good metric of popularity of a repo. Forks are copies (or clones) of a repository stored on GitHub.
-
The next line down are different tabs to different content associated with your repository: the “Code” itself, “Issues” for tracking issues, “Pull Requests” for merging new changes into the repository (from branches or forks), “Projects” for keeping organized lists of “To Do” items for your project, “Wiki” to create an online wiki associated with your repository, “Security” where you can set up security alerts or policies for your repo, “Insights” where you can see graphical representations of work done in (and status of) the repo, and “Settings” where you can change many things like who has permissions to directly commit to your repo.
-
The next line (box) contains quick links to see all of the Git commits made to the repository, what branches exist in the repository, what “releases” exist, and who all has contributed to the repo.
-
The next line contains buttons that give the ability to quickly switch or create a branch, create a new “Pull Request”, create a new file, upload new files, find a file, or get a link to the repo so you can clone it (or download it as a tarball).
-
The next section contains a view of the contents in the current directory of your repository (and your selected branch). You can view any of the files, or enter any directory, simply by clicking on it. Notice that our new repository contains only 3 files, a
README.mdmarkdown file, a.gitignore(which tells Git to not track certain files that match defined patterns), and aLICENSEfile that matches the Apache-2.0 format. -
Lastly, the contents of the
README.mdfile (a markdown file) are displayed if one exists in the current directory.
Adding changes directly from GitHub
You can add changes to your new repo directly from the GitHub in one of 3 ways:
- You can click the “Create new file” button and create a new file.
- You can select a file and directly edit it (if it is a text file).
- You can click the “Upload files” button to upload files to the repository that already exist on your laptop.
Let’s take a look at the LICENSE file (click on it) and edit it (click on the pencil icon on the top-right of the file contents page).
Scroll down to the bottom of the page and do the following:
- Remove the
APPENDIXsection (right after theEND OF TERMS AND CONDITIONSand just before theCopyrightline). - Update the Copyright date and owner (you!).
After making the changes, add a Git commit message in the box below the “Commit changes” section at the bottom. Then click the “Commit changes” button.
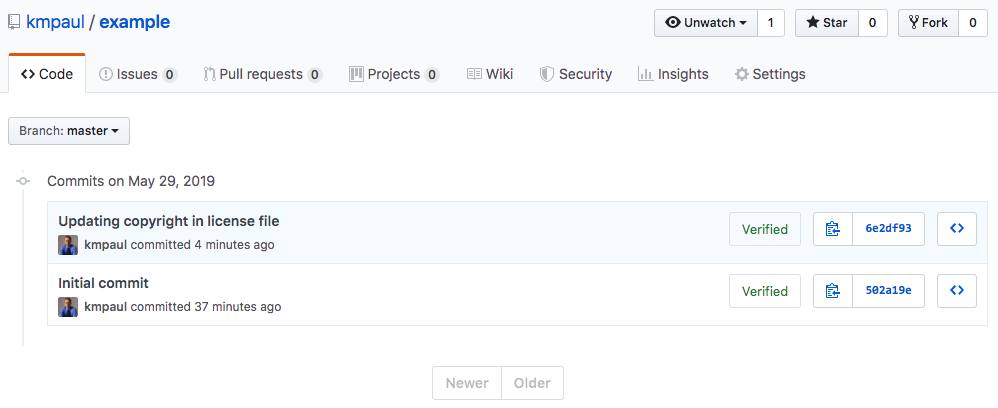
Now, if you click the name of your repo at the very top of the page, it should take you back to the repo home page and you should see “2 commits” in the quick-link box (middle of the page).
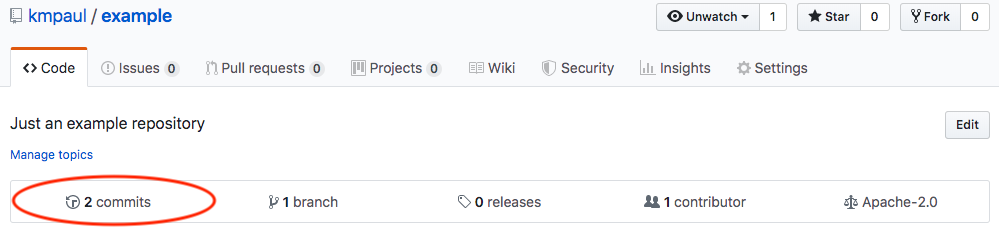
Click where it says “2 commits” and look at the log/history.